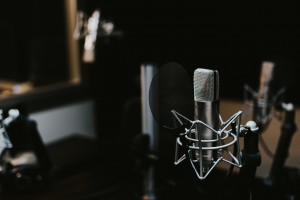
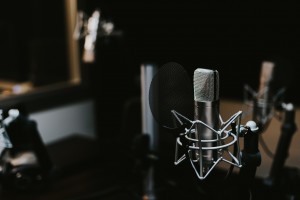
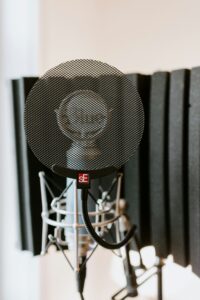
A microphone and a website are all you need to start doing VO.
Okay… that is a bit simplistic.
But, all you really need other than that is software to capture and edit audio, and something to kill background noise in your recording space. If you have that, and you’ve had training and a demo reel, you can record almost anywhere.

As for the website, it doesn’t have to be fancy. It only has to have a demo reel, a headshot, and contact info. You can go to town personalizing it., but you don’t need to.
Here’s how to hurry up and get started.
Microphone
For a VO warrior, the microphone is the sword.You don’t need the most expensive or deluxe sword to make a professional cut, but you do need something functional and well maintained.
Don’t spend a ton on a microphone if VO is all you’re doing with it. Honestly, the more expensive the microphone, the more obvious imperfections in your studio environment become. A $3,000 microphone doesn’t make you sound any better if you haven’t invested in a soundproof booth or insulation to house it. Spend 1/10th of that and you can still find a quality instrument.
Before you level up on technology, master the simple setup and experiment with filters, mic setups and capture settings to create different effects with your audio. Read reviews online and watch tutorials or demos of the mics that interest you the most. Make sure your system has all the necessary components (cords, adapters, phantom power, etc.) for connectivity and choose extra-long cables and connectors whenever possible; they give you more flexibility in your studio setup.
Remember, you don’t need to buy an expensive microphone. Some VO gigs, once you book them, will take place in a professional studio anyways. But, there is a ton of VO work out there for artists who can provide their own studio-quality recordings, or who offer other post-production services. If you seek to do this, there are lots of affordable microphone options.
A few of the highest-rated microphones for VO right now are:
Neumann TLM103. (Very pricey. Probably more than you need. >$1200)
Blue Yeti Pro (Popular choice among VO artists. I’ve used it before and liked it. >$200)
Rode NT1A. (<$350)
Audio-Technica AT2020USB. (<$150)
MXL 770 (I used an MXL kit for years on the road. The shotgun mic worked better for me than the condenser because it caught less background noise in adverse conditions. <$100)
A tech at your local Guitar Center (or the online retailer Sweetwater) can guide you through connectivity issues with your setup. Always consider asking for advice in online forums, too. Forums can be a fount of opinions to consider from enthusiastic (and sometimes expert) participants.
Software
ProTools is probably the most recommended software in the industry. Magazines and websites advertise it frequently and the pros do use it in many studios but, like it’s competitors (Soundforge, Reaper, Twisted Wave, etc.) it has a ton of features you don’t need. For basic VO submissions, ProTools is overkill. It’s a little like hiring a Symphony Orchestra when all you need is a garage band. It’s also expensive: >$600 for a perpetual license.
Adobe Audition is another popular option. I used it for years to produce commercials, radio shows, music and film audio. The Adobe Suite software has incredible step-by-step tutorials for just about any task you might want to explore. There are also tons of tutorials on Youtube. ($80/Month OR $20/Month for qualifying students)
For the beginner, there is a free software called Audacity (https://www.audacityteam.org/). It’s a simple waveform editing tool that is functional for recording, mixes and simple edits. It only takes a few minutes to understand the basics and you’re ready to go. If you go through a Such A Voice training program, you will become very familiar with it.
There are so many audio editing software choices, I highly recommend classes or at least the tutorials for any software you’re considering before making an investment in one that’s right for you.
Home Studio
If you don’t live next to an airport or construction site, you should set up at home. For some it may be worth renting a quiet office space nearby for recording but all hours access is important. Rush jobs are common in the VO industry and late at night is often the best time to record. Seek a nice bright space with control over any electrical hum. Avoid spaces with A/C, echo, mini-fridges, fans or any other appliances. Mitigate any sound that may bleed into your recording.
Ideally, your desktop computer or laptop should reside in a separate space from your microphone to reduce the possibility of audio contamination. The microphone should be as far away from the computer running the session as possible.
Make it comfy! – Without a recording booth, you’ll need to feather your nest a bit. There are lots of ways to keep echo from bouncing around, but soft materials are the best sound absorbers. Pillows, blankets, thick curtains, and other common household items work wonders to kill room noise. Rugs, soft cushy furniture, walls lined with heavy blankets and of course, acoustic foam are all excellent sound absorbers too.
Have a cool backdrop – Inevitably, you will be asked to Skype or Zoom into an audition or another meeting. When this occurs, you need cool lighting and an aesthetically pleasing but acoustically functional backdrop. Simple, uncluttered space and indirect light, either natural or incandescent, is best.
Website
A website is a crucial tool to project a professional image. It’s super easy and you should do it yourself. Don’t depend on anyone else to update or maintain your site or it will never be current. Use a professional web hosting site and claim your professional name as your URL if you can. If your name is taken, pick something cooler, catchy, or funny.
Your website only needs three things:
- Your Demo Reel: Include quick links to youtube or any other place your materials can be found.
- Your Headshots/Resume: Keep it simple & current. Even VO casting sometimes requests headshots and having one makes you seem more professional and versatile. Use them to decorate your site.
- Your Contact Info: Until you have an agent, direct inquiries to your professional email. (Never use your personal email!)
Well, there you have it! That’s basically all you need.
… if you’ve got talent.
Check out this article from SAV’s own Ben Marney for further reading on the subject of Home Studio gear!


