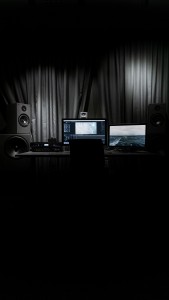
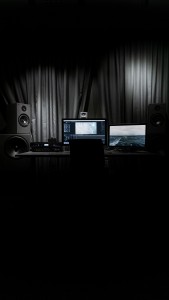
In the voice-over industry, every artist needs a strategy to deal with the quality of the audio they produce. One’s exact approach varies based on preferences, capabilities, and resources. Today, guest contributor Caroline Cole joins us to talk about her personal recording and editing process.
Y’all, when I began voice acting five years ago, I had NO idea how to edit audio. I wasn’t at all prepared for the world of voice-over in the 21st century, and I spent hours and HOURS watching YouTube videos, posting questions on forums, and receiving feedback from clients (Yikes!) about how to improve the audio on my deliverables.
Luckily for you, I’m happy to help you avoid these pitfalls. If you’re like me and extremely intimidated by the technical part of this career, have no fear!
I’m a big believer in the idea that a good voice actor doesn’t need to be a superb audio editor. Today I’ll offer you a few simple methods to employ before, during, and after recording that have helped me MAJORLY cut down my post-production time. Of course, you’ll get better as you practice, but I wish I had this guide when I began!

Of course, when you have big projects, you can outsource the longer editing to someone who really enjoys it. But every voice-over actor should be proficient enough to edit at
least 15 minutes of audio to a professional standard. Personally, if it’s longer than that, I’m charging enough to outsource the editing to a professional editor friend of mine.
It’s important to have a professional DAW (digital audio workspace), a strategy for acoustic treatment, dealing with breaths, and mistakes, and while there are a number of ways to achieve
those goals, here is what I do in my booth.
Let’s jump in.
First, you need a recording program (DAW). Personally, I love Audacity. It’s easy to use and free todownload. Works the same on a Mac or a PC – and Linux too if that’s you! You can go here to download.
Before You Record
One of the best things you can do for yourself when editing is to sound treat your space beforehand. Make sure you’ve got carpeted floors in your recording space (a rug or carpet remnant is great for this) and there aren’t any gaps between the door and the floor of your space. You can add a towel or blanket to muffle the sound. Also, if your computer has a fan that makes noise, leave it outside the recording space, so it’s not adding to the background noise.
During Recording
Before you start speaking behind the mic, wait three to five seconds to record ambient room tone at the top of the recording. Be totally silent and still in your space, don’t breathe audibly into the microphone. This lets the mic pick up the sound of the room or “room tone”.
Then, begin your performance. If it’s a short read, then record a few takes so you have options when editing. When (not if) you make a mistake while reading, take a moment to pause. Then snap, clap, or click your tongue before starting the sentence or phrase again. The spike in the audio will be easy to see when you’re editing and you can find mistakes quickly and simply.
Alternatively, you can do what’s called punch n roll. This is where you stop recording when you’ve made a mistake, then you “punch it back in”, in the exact spot you want to pick up recording again. When you hit record, there should be a few seconds of playback and then it starts recording again where you’ve indicated. This should provide a seamless pick up from where you’ve left off.
First Round Edit
Once you’ve hit stop and are sitting at your computer, SAVE THE PROJECT. First things first y’all. Save the Audacity project (or whatever DAW you’re using) so if something calls you away or you have a computer malfunction you don’t have to start from square one. This may sound like Computers 101, but you’d be surprised at the amount of audio I’ve lost. It’s embarrassing actually. Don’t let this happen to you!
After you’ve saved it, return to the beginning of the recording where you have that room tone. Select one second of room tone – listen closely to it to make sure there’s no rustling or audible sounds and save it to your clipboard. “Control + C” (or Cmd + C on a Mac) is the keyboard shortcut, or you can right click and hit “Copy”. Now, you’ve got some room tone saved for later use.
Next, begin at the END of the recording. Select everything from the final words you spoke to the end of the recording and paste room tone on top of it. “Control + V” is the keyboard shortcut for paste, or you can right click and select “Paste”. I like to paste three to five seconds of room tone at the end so the recording doesn’t come to an abrupt stop. To do that, I’ll hit “Control + V” three to five times.
Now, you’ll edit the actual performance. Quickly, going backwards through the audio, notice the spikes in the audio where you made mistakes if you weren’t using punch n roll (that’s where you clapped, snapped or clicked your tongue when in the booth). Find the mistakes and select the whole mistake, from where you’ve clapped/snapped/clicked to indicate that you started again back to the beginning of the sentence. Then, paste room tone on top with that “Control + V” (Cmd + V on a Mac) shortcut again. Repeat until you’re at the beginning of the recording.
At the beginning of your audio, select the 3-5 seconds of room tone and paste just 0.5-1 seconds so your performance starts fairly quickly.
Time to Listen and QC
Until now, you haven’t listened to your performance at all besides picking out mistakes. You save a ton of time by not re-listening to every mistake and using the marks you made in the audio to cut them out quickly.
But finally, you’re ready to listen through and edit out any loud breaths or obvious mouth clicks (see the Working Wednesday on Mouth Noise for more help on this). Also, make sure you’ve got the script open and you can catch any misreads or mistakes if you need to record any pickups.
Any Pickups?
If you have any pickups, record them now. Just hit record again on the same project, clap a few times if you want to delineate where the pickups start and the whole recording ends, and record any misspeaks you need to.
When you’re done recording, copy/paste the pickups where they need to go. Then, listen to the whole project again to make sure it all fits seamlessly. When you’ve tidied the audio how you like it, you can do a couple of simple things to improve the quality before exporting.
Post-Production
NOTE: IF YOUR CLIENT ASKS FOR RAW AUDIO DO NOT DO THE FOLLOWING THINGS. Just export what you’ve got and deliver it now.
If your client has not asked for raw audio, chances are they’ll be fine with you doing the following.
Normalize. The first thing I do is normalize the audio. Select all the audio, go to “Effect” at the top and scroll down to select “Normalize”. I have a client who likes everything to be at -3.5 dB so I use this as a baseline for my work. Depending on your recording space, mic volume, and other equipment, you may need something different. Fiddle around until the audio waves are mostly between 0.5 and 1.0 (this can be seen on the far-left side of your audio) and nothing is peaking – a.k.a. going above 1.0 and out of sight in the recording bar.
Remove room tone. Remember your room tone? How could you forget? 😉 Go ahead and select a few seconds at the beginning or end again. Now, go to “Effect”, and scroll down to select “Noise Reduction”. Follow the steps as guided to first get the noise profile and then select all of your audio to reduce the room tone for your entire project.
Before moving on, listen back to the audio. Does it sound too hollow or tinny? If so, chances are you removed too much room tone. Use the shortcut “Control + Z” to undo what you’ve done and adjust the noise reduction levels until it sounds like you prefer. Once you’ve set these levels for your studio you can pretty much keep them the same in the future, so you only have to do this once.
ONE LAST CHECK!
Before you export, listen to the whole thing once more as a final quality check. When you’re satisfied, go ahead and export and deliver your stellar audio!
Hope this helps all my non-techy friends cut down your editing time and get back to doing what you love – voice-over.
Caroline Turner Cole is a storyteller from Dallas, TX. Find out more at www.carolinecolestories.com or follow her on social media @carolinecolestories on Instagram and @ccolestories on Twitter.


