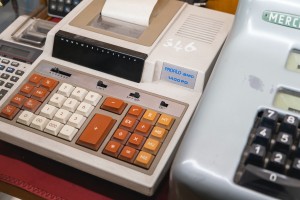
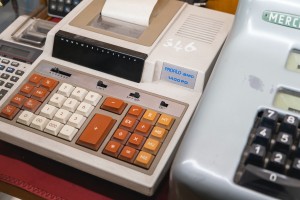
Ladies and gentlemen, I’m here to tell you, we’ve got it pretty good. Here in the 3rd decade of the 21st century, life for the everyday, garden-variety, friendly neighborhood voice actor ain’t bad, as things go.
Take for example, the mundane yet highly necessary task of tracking one’s business expenses.

Our forefathers and foremothers back in the 19th century had to rise before dawn, head out in the pitch dark to the barn, often in the snow, to fire up the old steam-powered expense tracker. Heck, even to shovel the coal was a chore that would make the average modern day voice actor shudder.
At the turn of the 20th century, gas powered models, the earliest with a kick-start, began to handle the work and make the voice actor’s life tolerable but still arduous. The post-World War II era ushered in sleeker, more modern and comfortable models, some with AM radios built right in.
Today, in the digital era of the 21st century, modern life is quite easy. Expense tracking has never been simpler or easier. No lasers, quantum time leaps, or artificial intelligence required.
In fact, all stupid extended metaphors aside, tracking your expenses to the last penny takes a little work to set up, but can be semi-automated to save to you ton of time and work in the long run.
First, we’ll assume that you’re using online accounting software. If you aren’t, get it. I use QuickBooks Self Employed, but there are others that do essentially the same job.
Step One: is to connect all of your accounts, checking, debit cards, credit cards, PayPal, Venmo, Zelle, and any others to your accounting software. This way every transaction is logged in your accounting software with literally no effort required by you.
Step Two: Make sure every purchase you make, both recurring expenses and one-offs, generates receipts emailed to yourself. If you have your own custom domain, you can even set up an email address to receive receipts, something like receipts@yourdomain.com.
Step Three: Set up a file system for your receipts. As receipts come in, save them as a pdf with the date and vendor name, for example “03-01 Squarepace.pdf” and file them in the receipts folder for that month, for example “2022-03”.
Step Four: At the end of the month go through your accounting software, assign all your transactions to business or personal, expense or income, and any transfers. In most software, you can even set up rules that will automatically categorize transactions for you as they come in, further saving you time and effort in the long run. Then, for your business expenses, attach and upload the corresponding receipts, which are already neatly filed and organized by transaction date in your receipts folder, so you know exactly where to find them. If you forgot to file one, the original should still be in your receipts email folder, which is why you collect them all there first. It’s a great backup.
Step Five: At the end of the year, repeat Step Four for December. Then you can generate your Profit and Loss Report (P&L), download your receipts file, and generate your Schedule C for your accountant or tax preparer. Some software allows you to give secure access to your accountant so that they can generate the reports they need.
Having all of this information organized will save you and your accountant come tax time. You’ll have a clear understanding month-to-month of where every penny is going and what your profit-and-loss situation is, which will better inform your spending decisions on an ongoing basis.
I’m a firm believer that always knowing your numbers is crucial to running your business. We’re here to make a profit. We can’t do that if we don’t know where the money is going.Tracking your expenses doesn’t have to be hard labor. It’s the 21st century, and we’ve got it pretty good, after all.
Check out our free PDF with pro-tips from real working voice-over actors here!
Want to learn more about voiceover? Signup for our introductory VO webinar.


