If you’re gearing up to build your first ever voice-over home studio, then this is the article for you! For me personally, getting my studio space up to par was by far the most challenging part of launching my voice-over career. I was living in a tiny studio apartment that I shared with my partner and our dog, and it felt nearly impossible to carve out a space for me to record – let alone have the sound quality be good enough to help me start booking my first gigs! After a few failed attempts, I now can say confidently that anyone can create a professional studio sound in their own home with a few clever tricks and the right materials!
Where should I set up my space?
This is the first thing to consider before you start shopping for any soundproofing materials. Where in my house/apartment/tiny home/renovated school bus/dungeon/cellar is the right space for me?

There are two main things to consider: where is your living space quietest, and where can you stand with enough room for a microphone to act comfortably. For most people, this space is a closet.
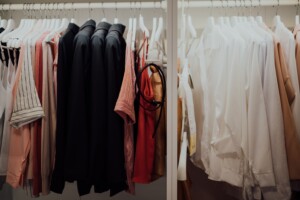
A clothing closet is my number one recommendation for your new studio. It is confined enough to be able to block outside sound, and already comes pre-stocked with free sound insulation – your clothing! If you truly have no closet space that you could squeeze into, others have seen success in carving out a corner of a quiet room and building a makeshift wall or two to block sound. But the easiest solution to get started quickly is without a doubt a coat closet.
What do I need to have in my studio to record?
1. A microphone!
My recommended brands are Audio Technica, Shure, or Neumann. There is a fairly wide price range for voice-over microphones, so be sure to find one that fits your price range. Audio Technica tends to be the best quality at the lowest price, so that’s the budget friendly recommendation. I personally use a Shure SM7B which has been a faithful partner to me for years now! Do a little research before you decide what works best for your budget and space. One more tip – I personally wouldn’t recommend USB mics, which connect directly to your computer without any extra cables. While I know some people have had success with them, generally the sound quality is much lower than other microphones. Use your best judgment here.
2. A computer!
If you have space for a desktop, by all means use it – but any laptop or computer that you like will work for this as long as it isn’t too outdated to handle your microphone and recording software. Another important thing to be careful of is your computer’s fan. Your computer will start to heat up on long recording days – make sure the cooling fan isn’t loud enough to be heard on your mic!
3. Audio interface & XLR cable
As long as you don’t go with the USB mic option, you’ll need a couple pieces of tech to connect your microphone to your laptop. The interface will essentially translate your sound into something the computer can understand. Whichever brand of microphone you’ve chosen will likely also sell this additional equipment. You can also check websites like Sweetwater.com – they have excellent customer support, and they’ll help you find the right interface for you.
4. Additional accessories
This may be headphones, a pop filter, a small desk for your mic stand or laptop, etc. All of these tools will definitely benefit you, but are entirely up to you to decide on. I rarely use my headphones, but my pop filter was a must-have.
5. Recording software
Don’t be alarmed! Some of the best recording platforms out there are free and easy to use. Audacity and ProTools can be downloaded online for free, and allow you to save your recordings in WAV, MP3, and any other format a client may ask of you.
Once we have all of our technology sorted and our space chosen, the last step is soundproofing. If you’re in your closet, the clothing that’s in there is already a great help to you. No need to move it. Many things you can find around your house are extremely helpful for insulating your space: blankets, comforters, rugs, and pillows are all your best friends. I have small area rugs covering my hardwood closet floors, a blanket hanging up on the ceiling to block sound from bouncing off the roof, blankets overtop my wooden desk where my microphone sits, and pillows on the sides of my microphone to help block sound even further.
At this point in time, I’ve since upgraded apartments and studio rooms – I now have a walk-in closet that’s completely changed into a studio space for me. There is still a coat or two hanging on the back wall, but I have instead covered all my walls with soundproofing foam panels. You will want some of these even if you’re still recording out of a clothing closet, and you may want even more if you have a whole room to yourself like me. These panels work wonders and can be tacked, nailed, or taped to walls in order to fully cover any surfaces that would otherwise echo your voice. Best of all: they’re cheap! You can find packs of 20, 30, or 50 on sites like Amazon. These are a must have!
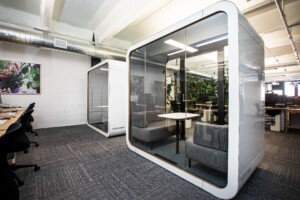
As you grow in your career, move, or just want to shake it up in the future, there are plenty of professionals online who go on to buy or create entire booths for themselves. If you’re a beginner, have no fear about using your closet – you don’t need to spend thousands on an upscale model build!
Check out our free PDF with pro-tips from real working voice-over actors here!
Want to learn more about voiceover? Signup for our introductory VO webinar.


